使用 openpyxl 库的 style 模块设置Excel样式,比如边框的线条和样式、对齐及填充样式
系列
类
style 模块有四个类:
Side        : 定义边框线条
Border      : 定义边框样式
Alignment   : 定义对齐样式
PatternFill : 定义填充样式
Side与Border
1
2
3
4
5
6
7
|
from openpyxl.styles import Side, Border
side = Side('thin')
border = Border(bottom=side, left=side, right=side)
|
thin : 表示细的
PatternFill
1
2
3
4
5
|
from openpyxl.styles import PatternFill
fill = PatternFill('solid', fgColor='FFE4E1')
|
solid : 表示纯色填充
fgColor : 表示颜色,RGB值见 https://tool.oschina.net/commons?type=3
Alignment
1
2
3
4
5
|
from openpyxl.styles import Alignment
align = Alignment(horizontal='center', vertical='center')
|
horizontal : 表示水平方向
center : 居中
left   : 左居
right  : 右居
vertical : 表示垂直方向
center : 居中
top    : 靠上
bottom : 靠下
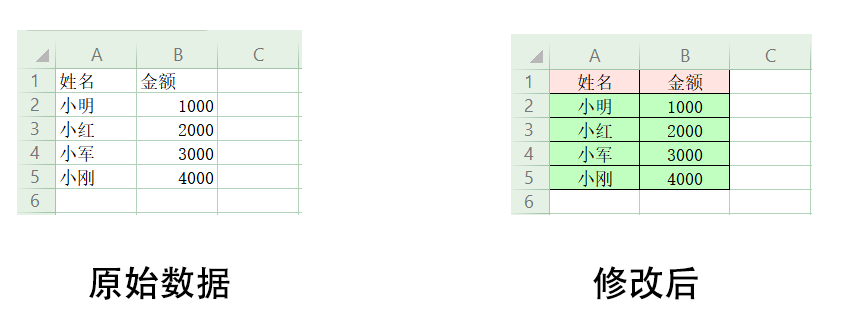
实例
1
2
3
4
5
6
7
8
9
10
11
12
13
14
15
16
17
18
19
20
21
22
23
24
25
26
27
28
29
30
31
32
33
34
35
36
37
38
39
40
41
42
43
44
45
46
47
48
49
| from openpyxl import load_workbook
from openpyxl.styles import PatternFill, Alignment, Side, Border
path = './abc.xlsx'
wb = load_workbook(path)
ws = wb.active
ws.column_dimensions['A'].width = 10
ws.column_dimensions['B'].width = 10
side = Side('thin')
border = Border(bottom=side, right=side)
header_fill = PatternFill('solid', fgColor='FFE4E1')
bottom_fill = PatternFill('solid', fgColor='C1FFC1')
align = Alignment(horizontal='center', vertical='center')
for cell in ws[1]:
cell.border = border
cell.fill = header_fill
cell.alignment = align
for row in ws.iter_rows(min_row=2):
for cell in row:
cell.border = border
cell.fill = bottom_fill
cell.alignment = align
wb.save(path)
|